
<- Go Back
Submit & Indexing
Google Account Setup
The Setup tab in RankFrame's Submit Indexing section prepares your Google account connection and verifies domain ownership in Google Search Console. Both steps are required before you can submit URLs through the Indexing API.
Last Updated on
Read Time
3 min read
Overview

Before RankFrame can push URLs to Google using the official Indexing API, you need to complete the Setup tab. Setup links your Google account to the plugin and confirms that you have verified access to your Framer site's property in Google Search Console.
The Setup tab contains two steps. Both run automatically after you authorize your Google account. You do not need to log into Search Console, create a property manually, add a verification meta tag, or configure any DNS records. RankFrame handles all of it on your behalf.
Setup only needs to be completed once. Your connection persists across sessions unless you choose to disconnect or revoke access.
The two Setup steps
The Setup tab shows two numbered steps. Both are automatic after you complete the Google OAuth authorization in Step 1.
Connect Google Account: Authorize RankFrame to access your Google Search Console through Google's standard OAuth flow. Once connected, your account email appears in the Setup tab with a Disconnect option.
Domain Verification: RankFrame automatically verifies your domain in Google Search Console. No action required. A green success box appears when verification is complete.
1. Connect Google Account
This step authorizes RankFrame to access your Google Search Console. What you see depends on whether a Google account is already connected to the plugin.
Path A: No account connected yet

The Setup tab shows a connection screen. Click the button to start the Google OAuth flow. A Google sign-in window opens. Choose your Google account and grant RankFrame permission to access Google Search Console. After you approve, the window closes and the Setup tab updates to show your connected account.
Path B: Account already connected
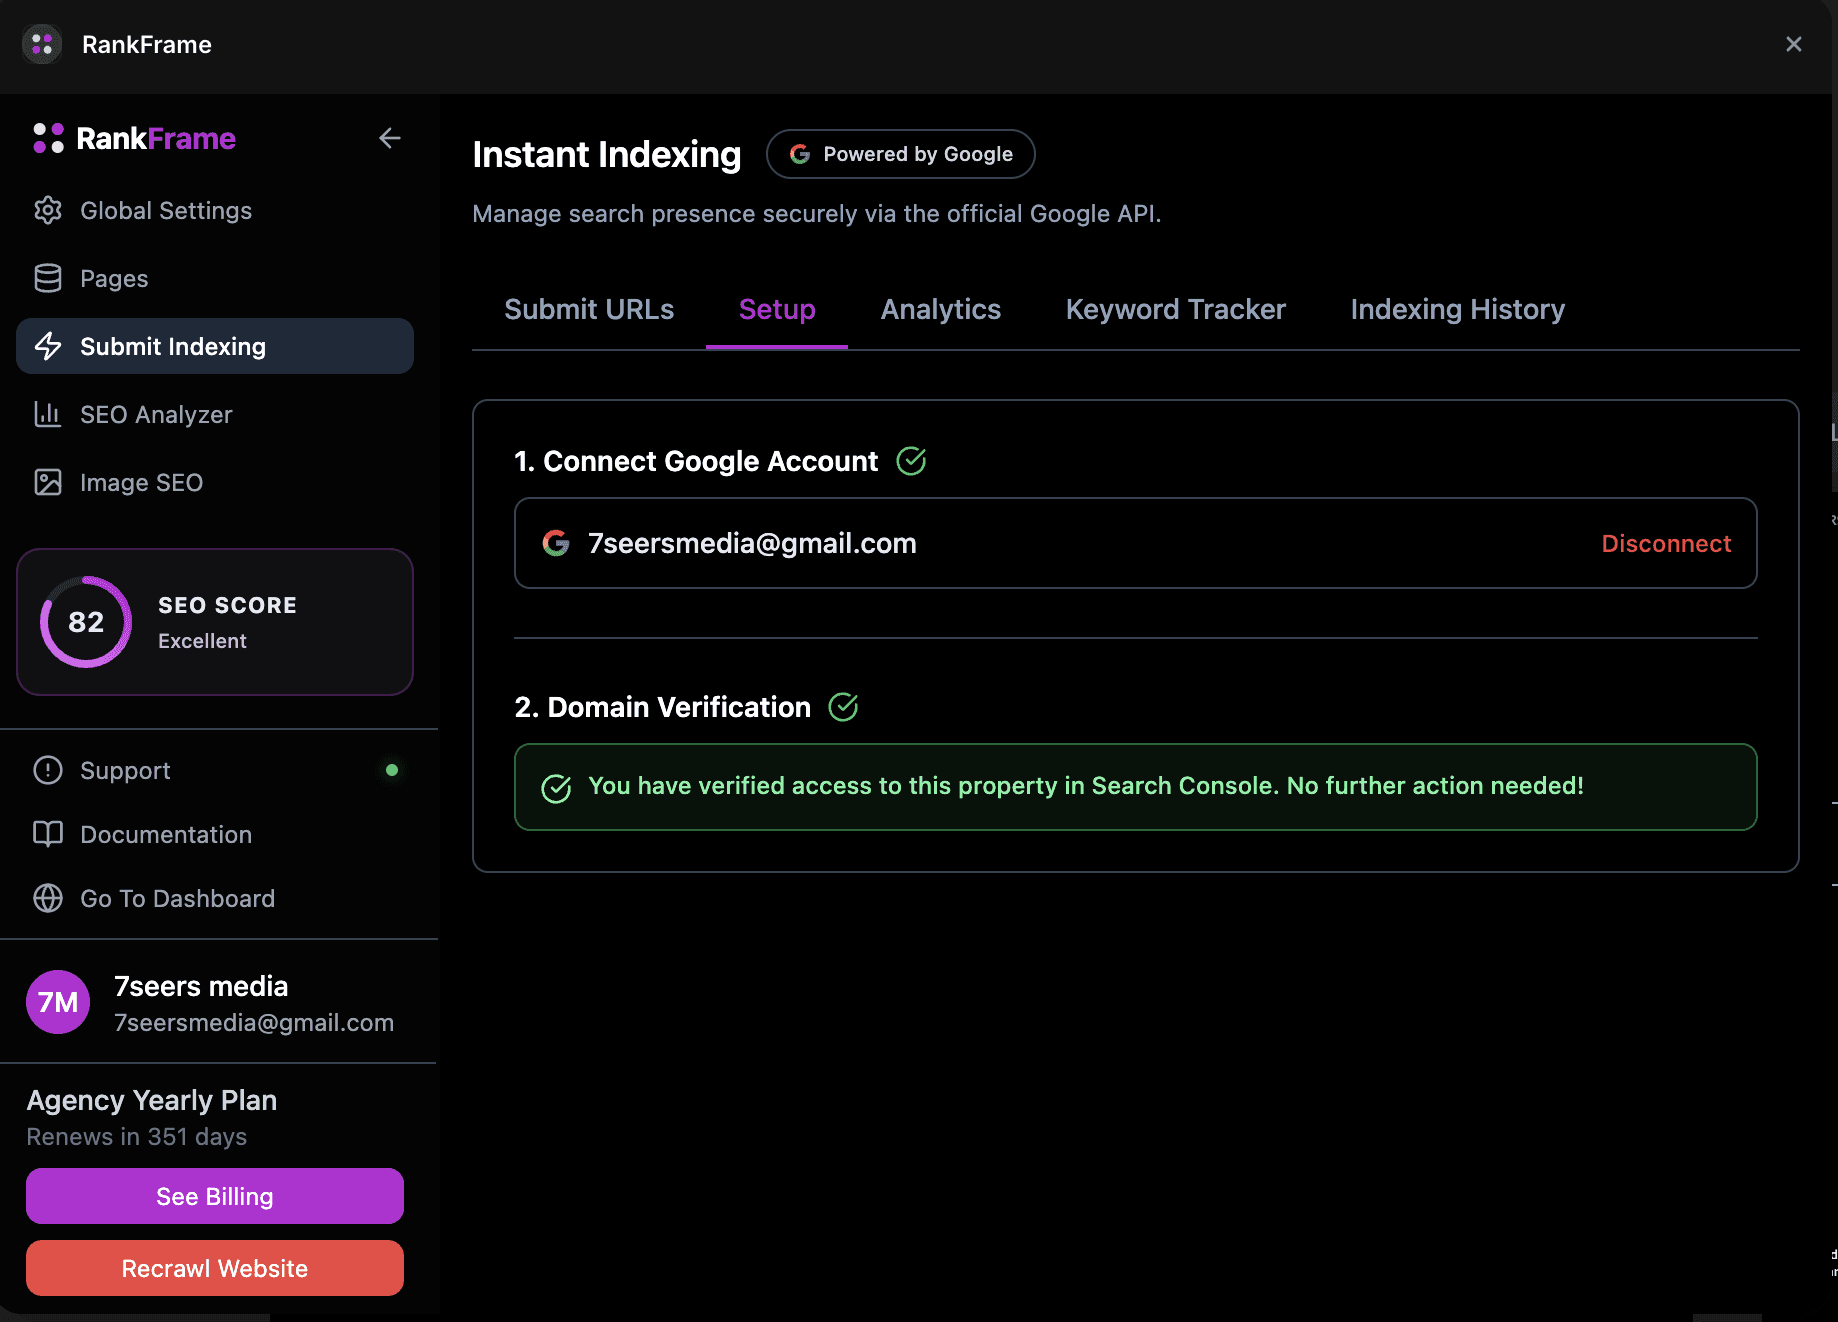
The Setup tab shows your connected email address alongside the Google G logo. This confirms that RankFrame is actively authorized. A Disconnect option appears in red text below the email address.
Click Disconnect only if you want to switch Google accounts. Disconnecting removes RankFrame's access token. You will need to go through the OAuth flow again to restore URL submission.
2. Domain Verification
This step verifies that RankFrame has access to your site as a property in Google Search Console. It is completely automatic. RankFrame handles everything on your behalf.
Once your Google account is connected in Step 1, RankFrame runs domain verification automatically. You do not need to add a verification meta tag, upload an HTML file, or create any DNS records.
When verification succeeds, you will see a green confirmation box: "You have verified access to this property in Search Console. No further action needed!" Once this appears, Setup is fully complete and you can move to the Submit URLs tab to start pushing pages to Google.
If the green box does not appear after connecting your account, wait a few seconds and refresh the Setup tab. Verification typically completes within moments of the Google account connection.
Frequently asked questions
Do I need to set up Google Search Console manually before connecting RankFrame?
No. RankFrame handles domain verification automatically on your behalf. You do not need to create a Search Console property, add a verification meta tag, or configure any DNS records before starting. Connect your Google account and RankFrame takes care of the rest.